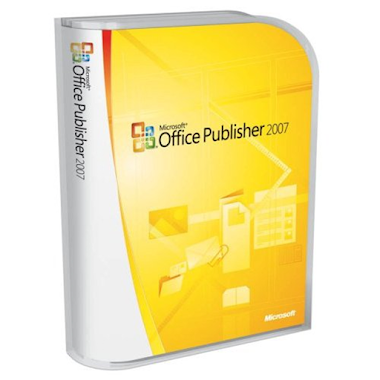
Publisher first made it’s
entry in 1991 as “Microsoft Publisher for Windows” (v1). Its debut consisted of
3 floppy disks, including clipart, totaling 4.32mb. Every other year there
after, Microsoft released a new version of Publisher adding features (and size)
based on feedback from home office workers and commercial printers. We are now
on the 9th version of Microsoft Publisher (though technically
Microsoft has given Publisher 2007 the v12 branding to be consistent with the
rest of Microsoft Office), with a substantial number of improvements over the
past few versions.
Publisher is aimed at the home consumer as well as the small business market.
Those looking for an all in one application that can produce their business
brochures, letters, business cards, thank you notes, and mail merges from databases
for sending out postcards will find Publisher the all in one solution.
Publisher can hold your hand in designing your entire business portfolio of
marketing material with thousands of combined wizards and templates. For the
more ambitious, one can take full control of their designs from the ground up
using Publisher. Starting with a blank page, a user can design a publication,
save it as a template for future use, as well as share the design elements of
that template with other custom templates to keep a consistent and more
professional output.
Features
The first time Publisher
opens, the user is presented with a easy to read, well laid out start up screen
offering you direction, and options. High resolution template thumbnails, a
large library list of templates, a search field to narrow down your choices, as
well as access to your personalized publications and templates.
The presentation of recent
publications (in the Recent Publication pane) is dramatically improved. Not
only do you see a thumbnail of the file show the content of the publication,
you will also see a tooltip when you hover over the thumbnail showing you the
location of the template on your computer.
Once you get past the
revamped start up wizard, you will presented with a user interface that dates
back to Publisher 2002 (with a little 3D upgrade). Publisher 2007 is one of the
few applications in the Office 2007 suite of products that did not get the all
new “Ribbon” toolbar (see our AWIN review of Office 2007). The toolbar gets a
few new icons, such as the printer icon, and added Content Library icon, and a
Publisher Tasks icon (useless feature in my experience).
The Content Library is new
for 2007. This is a feature that was requested by the more vocal users in the
Publisher community, as well as presented by the Microsoft Publisher MVPs over
past few years. People wanted the ability to save any object that they created
in Publisher (text box with text, styles, images, shapes, and all the
customizations applied to those objects) in a place that would be store for any
publication, be it new or old. This new feature allows you to organize your
objects by category.
Publisher Tasks, a new
button added to the toolbar, opens up the task pane with links to a few
frequently asked questions, which essentially opens the help dialog at some
point, walking you through the steps required to accomplish that certain task.
I found that to be a wasted task pane, clutter to the toolbar (which you can
remove), and redundant to the help feature that one could just use instead.
While most of the Office
suite received the Ribbon update, many of the apps also received the latest
office art update (shapes, fills, transparencies, 3D), where Publisher was
again left behind. Microsoft’s reasoning is because the new art does not adhere
to Publisher’s CMYK features (a color separation feature for commercial
printers). However, Publisher does get a major improvement in the database and
merging options.
While Microsoft Word
allows you to mail merge to labels, envelopes and letters from a text database,
Microsoft Publisher adds the ability to merge photos as well. With databases
already setup with paths to images, or databases of text, the Wizards in
Publisher can walk you through merging text and photo’s to catalogs, brochures,
postcard, newsletters, labels, envelopes and more. Publisher also allows you to
take all those merges, and mass email them to clients, potential customers, and
even spam.
The number one request for
Publisher over the past 5 years has been PDF output for Publisher. Publisher
has a proprietary file format that cannot be read by any other application
(exception is Adobe Pagemaker). PDF is a file format that is considered to be
the industry standard for print shops like Kinkos, and commercial print houses.
Years and years of meetings from Microsoft Publisher MVPs voicing the community
outcry, as well as online feedback from consumers, finally convinced Microsoft
to implement PDF output for the entire Office 2007 line up. The team to develop
this new feature was the Publisher team. The beta of Office 2007 was released
with the new PDF feature built in. It wasn’t until a couple months before the
release that Adobe (creator of the PDF file format) cried foul, and Microsoft
had to pull the PDF feature from Office. In turn, it was made as an optional
(but free) download from Microsoft Office online. An inconvenience for
consumers no doubt, but made as a simple transaction direction from the File
menu within Microsoft Office (Orb menu in some of the office applications).
Publisher attempts to be
too much for so little, and that shows in the web design department. Publisher
has the ability to turn almost any creation into a website (and also includes
web site templates) which will match your entire marketing portfolio. This
feature has been present in Publisher for many years now, and has been
unpolished. The feature remains unpolished today, with the exception of a new
feature. The ability to add a bookmark to your website was implemented. Long
over due, and already a day late. Speaking with a contact at Microsoft, future
versions of Publisher will no longer offer web publishing improvements (or
possibly eliminate some web features) in order to concentrate on publication
design.
Another rather large
overhaul is seen in the Printer and Page support. The complaints about
Publisher in this area have been numerous. Complaints included publication
print outs that exceeded the printer margin did not offer a warning to the
user. Once the page was printed, users didn’t know why their publications were
cut off around the edges, assuming that all printers have the ability to
“bleed”, and Publisher did not. This was fixed in Publisher 2007. Another
problem included printing labels. The majority of the time, users would want to
print a single label from a sheet of multiple labels. Prior to 2007, Publisher
could only print an entire sheet of labels at a time, where as Microsoft Word
allowed users to choose which label, in which column and which row to print on.
The Publisher team added this to the latest version of Publisher.
Publisher has had a
feature called the “Design Checker” for numerous versions. Previously, this
design checker would look for mistakes in your publication (such as blank
pages, overlapping text objects, and more). There was a wizard that scanned
your entire publication, and then prompted you with a dialog boxing showing you
what needed to be fixed. Publisher 2007 has enhanced this feature with ability
to check your publication commercial printing issues, as well as issues with
email merge problems, and web site publications. You are given much better
descriptions of the problem than in the past, with a feature that let’s you
choose to have Publisher fix the problem automatically for you, or take you to
that problem and let you make the necessary adjustments (or choose to skip).
Another useful feature in
Publisher 2007 is the Graphics Manager. This is a task pane that is viewable on
the right or left of your publication window (as are all of the task panes).
This task pane will show you thumbnails of all the graphics in your
publication. Picture if you will, a 150 page publication, looking for a
specific graphic that you want to replace. This graphics manager looks through
the entire publication and displays every graphic for you. Choosing the
thumbnail allows you to replace that image directly from the task pane without
having to go to the page within the Publication. You can also choose to have
the graphics manager take you to the page in the publication that the images
resides in. Finally, you can choose to look at the properties (details) of the
image, to see a summary of the image size, format, and more.
Final Comments
|
How It Grades
|
|
Installation: 95%
Features: 75%
Design: 90%
Ease
of Use: 85%
Price/Value: 90%
Documentation:80%
Overall: 86%
|
Not all is perfect with
Publisher. Microsoft continues to drop the ball in many areas. The ability to
change the default font for Publications (easily done in Microsoft Word) is not
an option unless you know the work around (saving a normal .pub template in the
proper directory). This is a top rated complaint that still has not seen the
light of day, and has been brushed under the rug numerous times during meetings
with the Publisher team.
It’s inexcusable that the
PDF functionality is not built in, with other Office suites including this
feature standard. Inconsistency with the rest of the Office suite is also a big
issue. Publisher should have included the new Escher Art office tools as seen
in Powerpoint for the last two versions. The Ribbon toolbar should have been
implemented (supposedly on tap for the next version of Publisher). Maximum zoom
in Publisher remains at 800%, though 1600% is found in competing desktop
programs. Publisher does offer 1000% zoom in print preview mode, but that is
not efficient for making adjustments that require pixel precise movements.
The graphics manager,
while a very impressive feature, still lacks in one important feature. If you
have more than one of the same image in the publication, you cannot choose to
replace all the images at one time. You must do each one individually. This is
something I picked up on during the beta, and informed the team about, but fell
on deaf ears.
There remain numerous bugs
over the years (MS calls them features), but MS continues to iron out the
majority of them. The Publisher team still can’t figure out how to take a dent
out of the Adobe and Quark business. The majority of commercial printers still
shun the thought of a Publisher file in their inbox. Publisher 2007 has made it
a bit easier for them with the option of a free PDF export.
Publisher is user friendly
for the new and old computer users, comes in at a rock bottom price for the
features, and accomplishes a lot in a very little amount of time. This product
is highly recommended.
|
Specs
& Package
|
|
Overall
Score
|
86%
|
|
Version
Reviewed
|
Office
Publisher 2007
|
|
Release
Date
|
Out
Now
|
|
The Good Points
|
Numerous
professional templates
Easy installation
Familiar interface
Improved performance
|
|
The Bad Points
|
Retains
old design
Merges can be cumbersome
No adherence to Windows Themes
No PDF out of the box
|
|
In
The Box
|
|
|
Similar
Product
|
Microsoft
Office Publisher 2003
|
|
System Requirements
|
500
MHz processor or higher
256 MB RAM or higher
1.5 GB HD Space (some versions require 2 GB or Higher)
CD-ROM or DVD Drive
1024 x 768 or higher monitor resolution
Microsoft Windows XP SP 2, Microsoft Windows Server 2003 SP1, Windows Vista
or higher
|
|
Reviewer's PC
|
IBM
Thinkcentre
Intel Pentium 4 3.00GHz
512 MBs of RAM
Intel Onboard Graphics Controller
Windows XP Professional SP2
|


